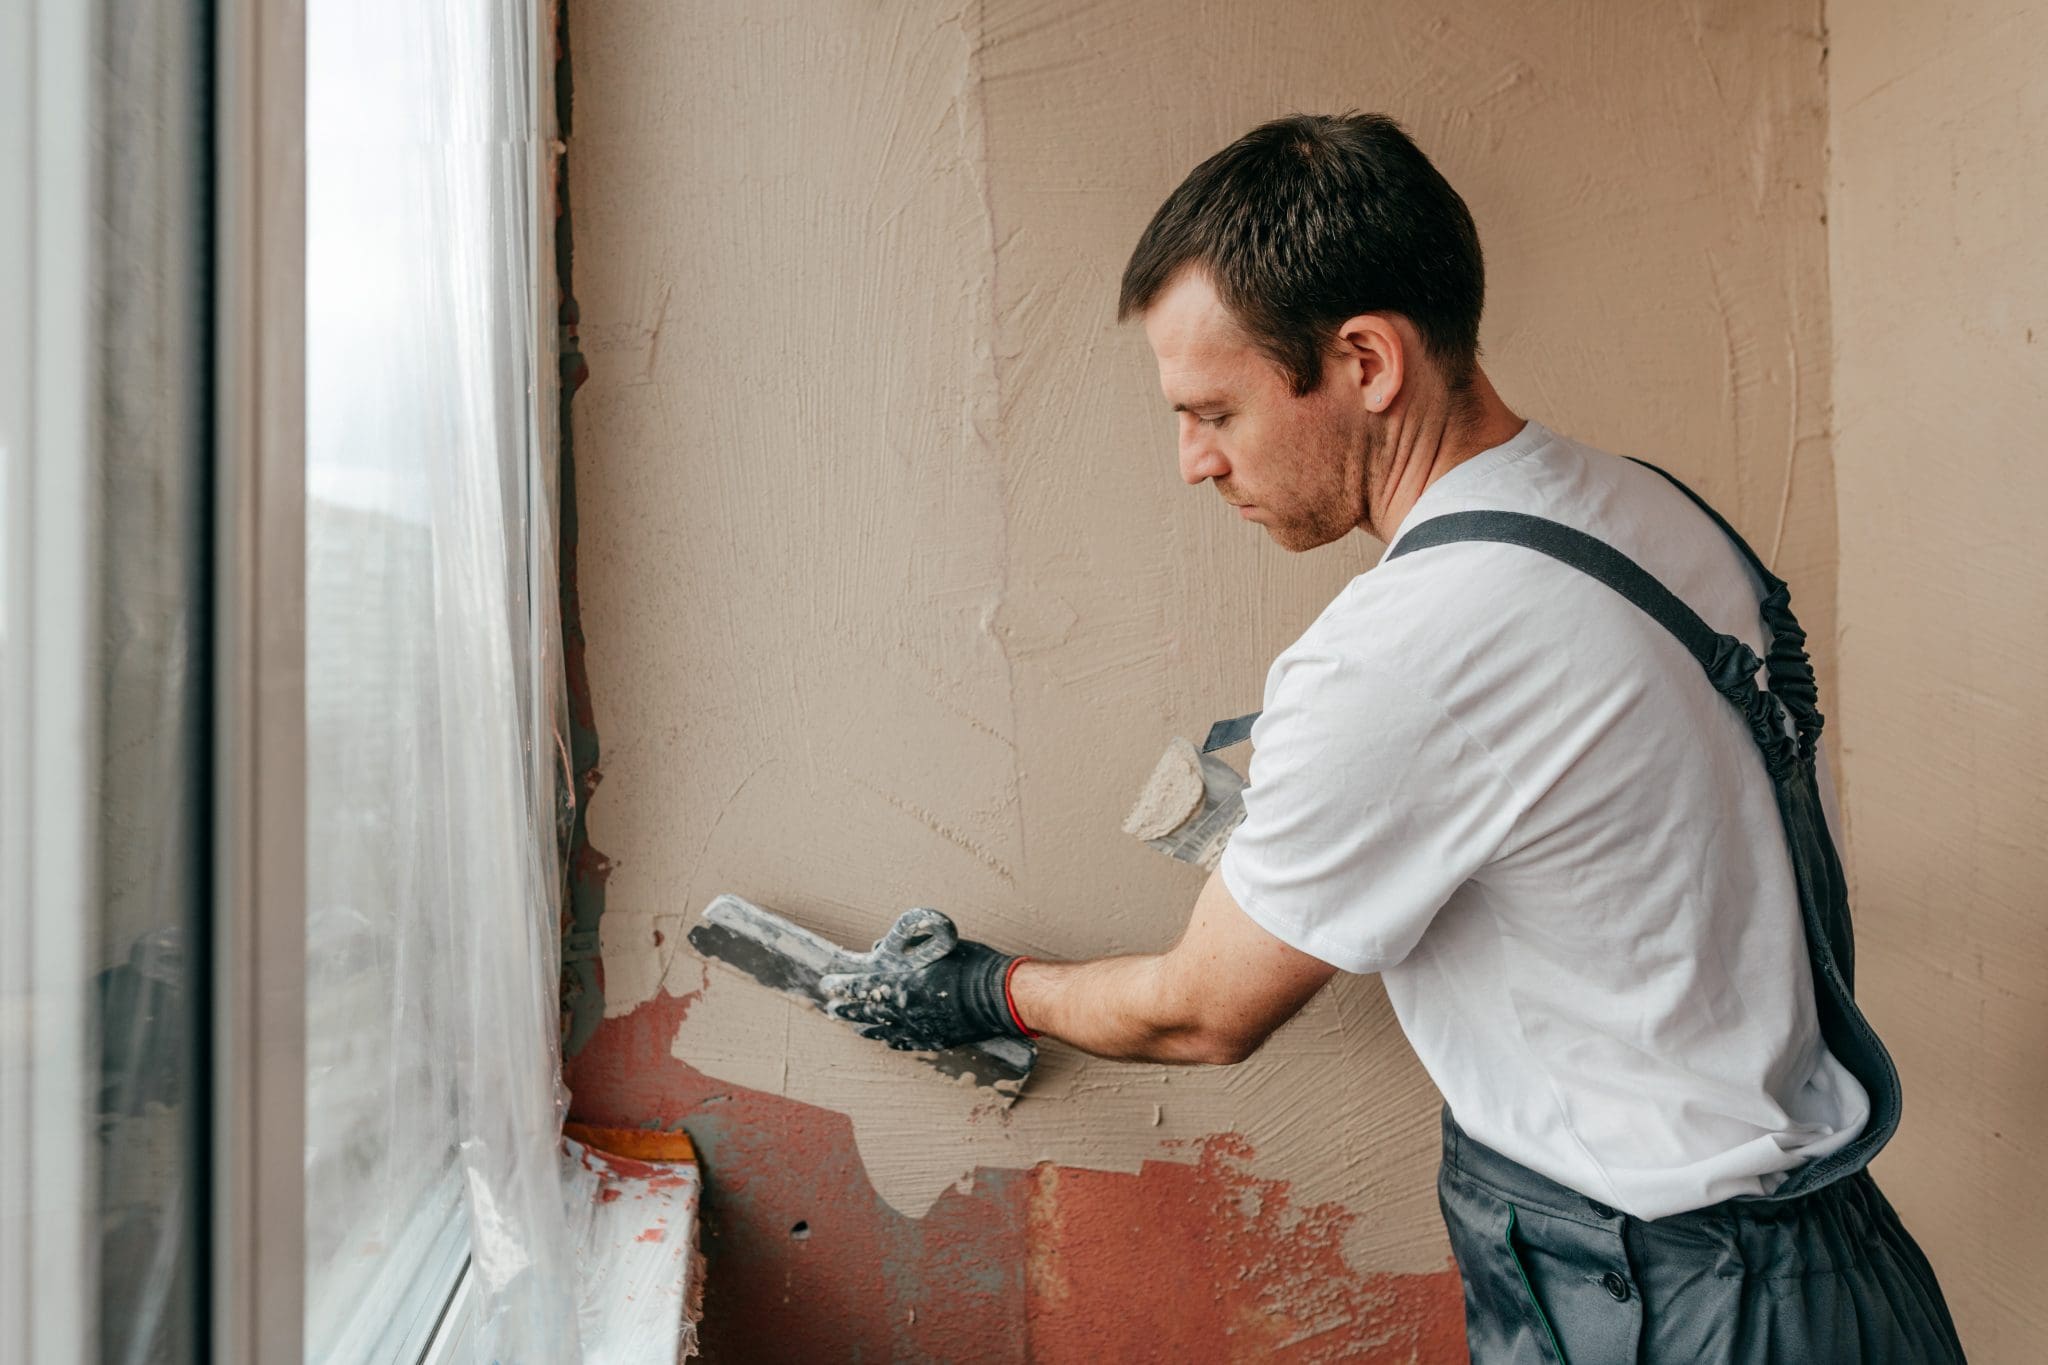
When it comes to plastering, I can’t stress enough how vital it is to prepare the surface correctly. Many people – and even some in the trade – may underestimate the importance of this stage. However, overlooking proper surface preparation can lead to a host of problems down the line, from poor adhesion to cracking, ultimately leaving you with an uneven and unappealing finish. At 3D Construction, we believe that proper surface preparation lays the groundwork for quality and durability in every plastering job we undertake. Here, I’ll walk you through why this step is critical and share the essential steps we use to set up each project for success.
Ensuring Strong Adhesion
One of the main reasons for prioritising surface preparation in plastering is to ensure that the plaster can properly adhere to the surface. Plaster needs a clean, solid foundation to create a reliable bond, and any loose particles, dirt, or grease can prevent it from sticking effectively. By preparing the surface thoroughly, we remove dust, grease, and any flaking materials that could weaken the adhesion. With a clean and solid base, the plaster has a stable surface to adhere to, resulting in a robust and enduring finish.
Minimising Cracking
Cracks are a common problem in plasterwork, and they’re often a direct result of inadequate surface preparation. When plaster is applied to a poorly prepared surface, it can dry unevenly, which increases the likelihood of cracks. Proper preparation creates a balanced and stable foundation, significantly reducing this risk. In our work at 3D Construction, we address any existing cracks or holes, smooth uneven surfaces, and ensure the surface is dry and free of moisture. These steps prevent unwanted cracking, so the finished plasterwork remains smooth and intact over time.
Achieving a Flawless Finish
A well-prepared surface is the key to achieving a smooth, professional-looking finish in plastering. If the base surface is rough or has imperfections, they’ll show through the plaster, creating an uneven and unattractive appearance. Meticulous surface preparation allows us to address any bumps, dents, or protrusions, giving us a clean, even foundation for the plaster application. When the plaster goes on evenly, it results in a seamless, polished finish that enhances the overall look and feel of your walls or ceilings.
Boosting Durability
Proper surface preparation doesn’t just impact the look of your plasterwork; it directly affects its longevity as well. By removing any loose particles or contaminants, we provide a solid surface that supports the plaster and prevents detachment or peeling. Additionally, by repairing existing cracks and imperfections, we keep them from worsening and affecting the integrity of the plaster over time. With our careful preparation process at 3D Construction, we aim to create plastered surfaces that can withstand daily wear and remain intact for years to come.
Key Steps in Our Surface Preparation Process
At 3D Construction, we follow a tried-and-true process to ensure every plastering surface is properly prepped. Here are the essential steps we take:
- Thorough Cleaning: We start by clearing the surface of any dust, dirt, or grease. Depending on the condition of the area, we use a broom, vacuum, or specialised cleaning solution to make sure everything is thoroughly cleaned.
- Repairing Cracks and Holes: Next, we fill in any cracks or holes using a filler that matches the surface. We then smooth these areas to ensure a flat, even surface, preventing issues like cracking down the line.
- Removing Loose Material: Any loose or flaking material, including old paint or wallpaper remnants, is carefully removed. This step is critical because even the best plaster can’t adhere to a weak, peeling base. We use scrapers and putty knives to ensure a clean foundation.
- Smoothing Uneven Surfaces: Uneven surfaces can result in an inconsistent finish, so we sand down any rough patches to create a level area. This step is essential to achieving that smooth, flawless finish that looks polished and professional.
- Ensuring a Dry Surface: Before applying any plaster, we make sure the surface is completely dry. Any residual moisture can cause issues with plaster adhesion, so we take the time to ensure the surface is moisture-free for the best results.
- Priming the Surface: Finally, applying a primer to the surface helps improve adhesion and promotes an even drying process. This step not only enhances adhesion but also contributes to a more uniform and durable finish.
In Conclusion
Proper surface preparation is a step that should never be skipped or rushed. By ensuring strong adhesion, reducing the risk of cracks, creating a smooth finish, and boosting durability, we can achieve a quality plastering finish that stands the test of time. At 3D Construction, we take pride in our attention to detail, knowing that a well-prepared surface is the foundation for a successful plastering project. If you’re considering plastering work and want it done right, reach out to us for a consultation and discover how our expertise can bring a professional, long-lasting finish to your home.