Adding extra storage to your home doesn’t have to be complicated or expensive. Installing a floating shelf is a simple yet stylish way to maximise your space while adding a modern touch to any room.
Whether you want to display your favourite books, showcase decorative items, or keep everyday essentials within easy reach, a floating shelf offers a practical solution. In this guide, we’ll walk you through the steps to install a floating shelf, from choosing the right materials to ensuring a secure fit. Get ready to transform your walls with this easy DIY project!

Materials Needed:
- Floating shelf kit (includes shelf and mounting hardware)
- Level
- Measuring tape
- Pencil
- Drill
- Wall anchors (if mounting on drywall)
- Screwdriver
- Stud finder (optional)
- Safety goggles
Step-by-Step Guide:
1. Choose the Right Location
First, decide where you want to install the floating shelf. Consider the height and ensure there’s enough space for the items you plan to place on it. Use a stud finder to locate studs in the wall for a more secure installation. If you can’t find studs, wall anchors will be necessary.
2. Measure and Mark
Measure the desired height for your shelf using the measuring tape. Mark the spot lightly with a pencil. Use the level to draw a straight line where the bottom of the shelf will sit. This line will serve as a guide to ensure your shelf is perfectly horizontal.
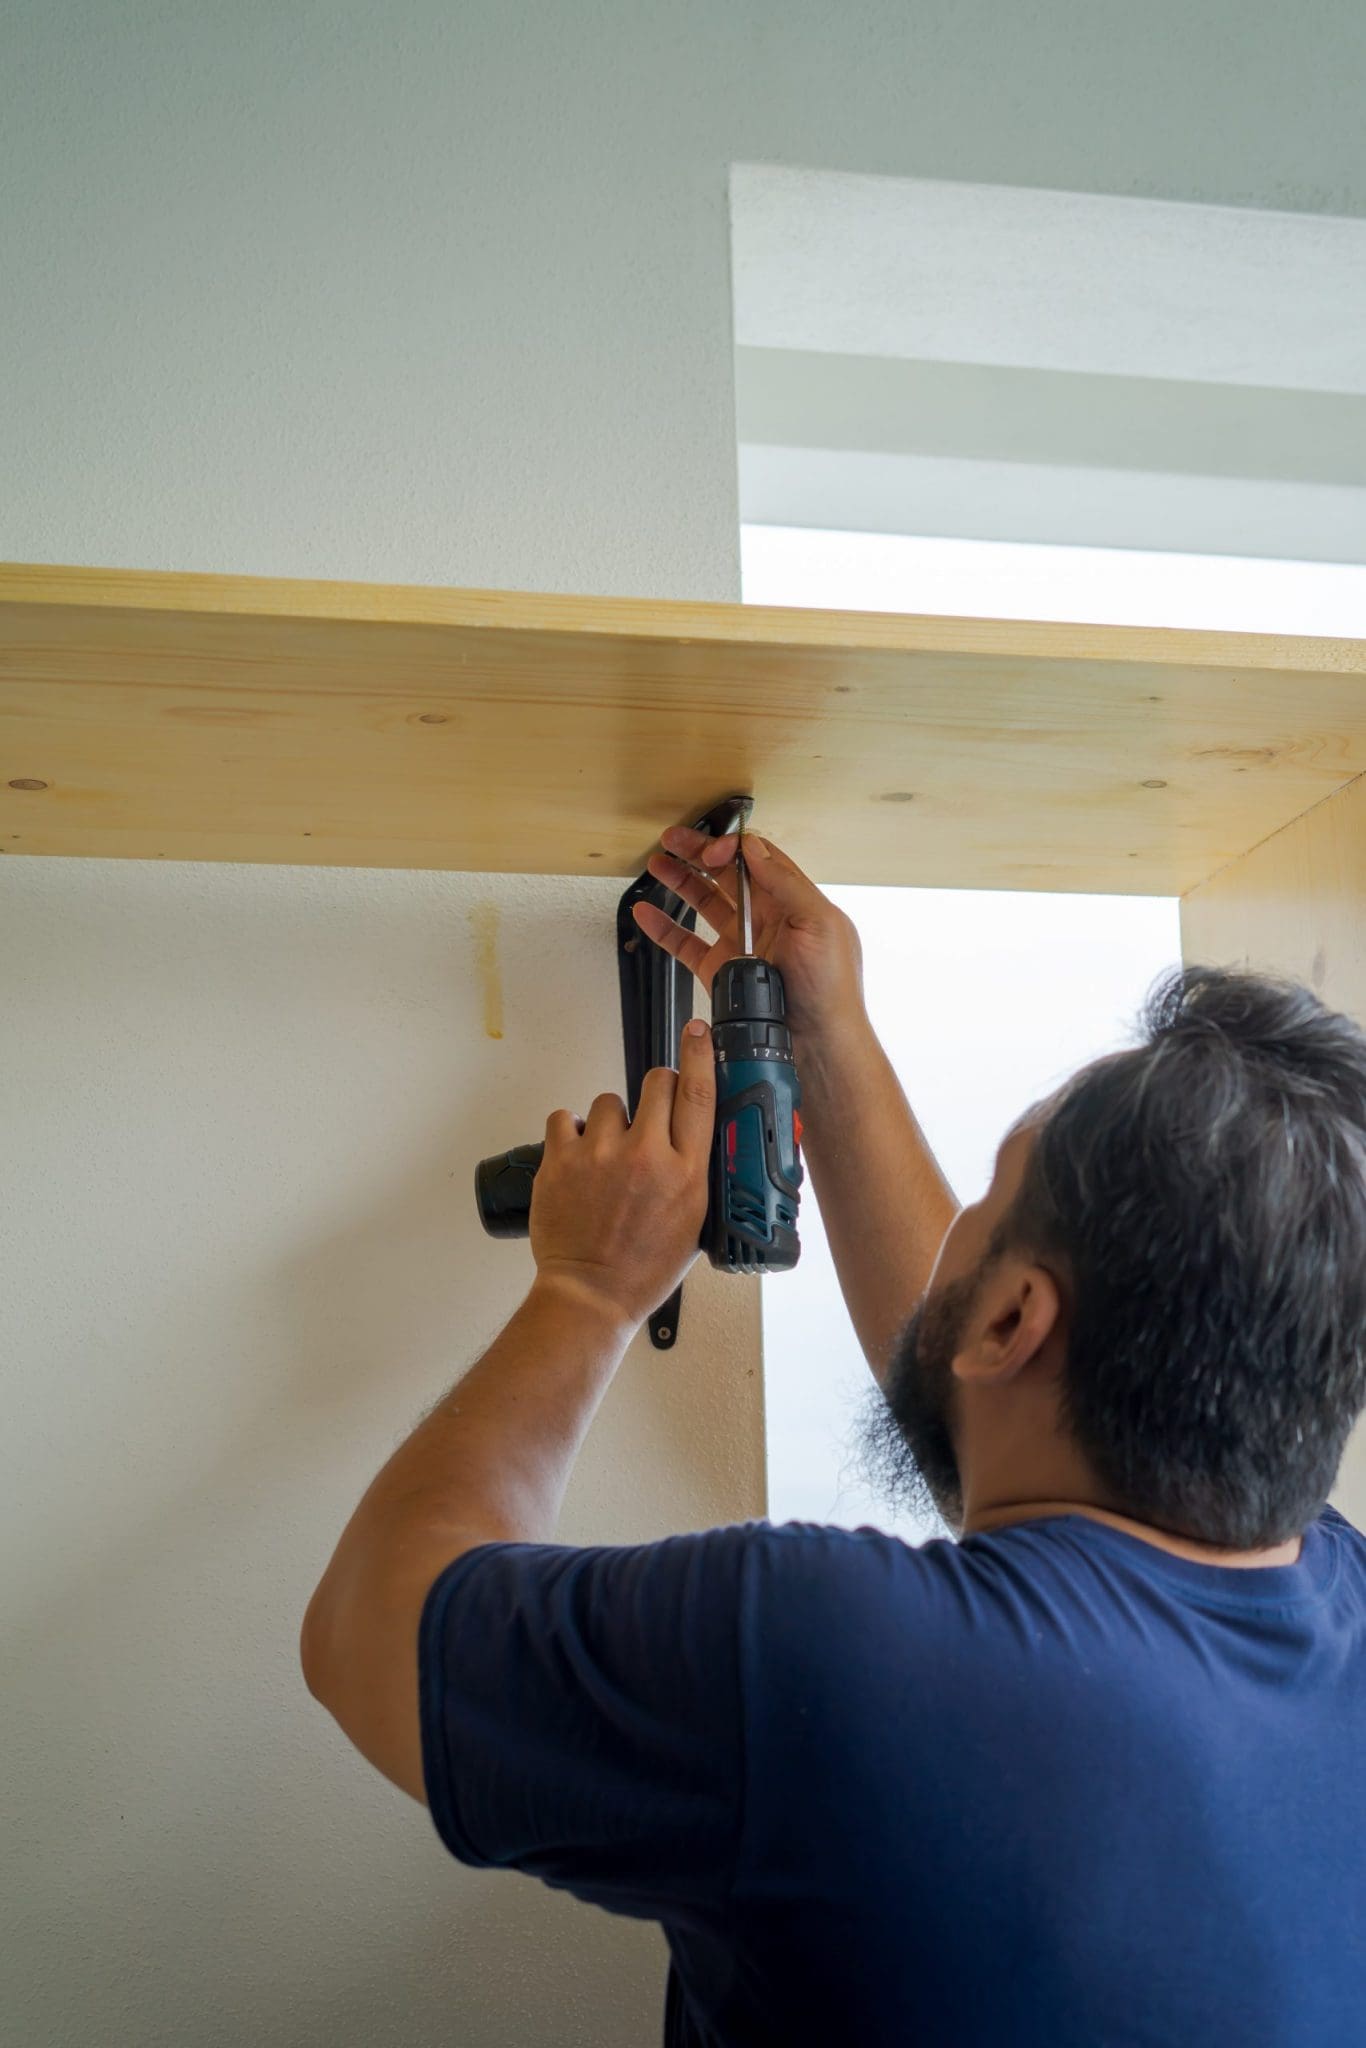
3. Install the Brackets
Most floating shelves come with brackets that are installed first. Hold the bracket against the wall, aligning the bottom edge with the pencil line you’ve drawn. Mark the screw holes on the wall through the bracket’s mounting holes.
4. Drill Pilot Holes
Remove the bracket and drill pilot holes at the marked spots. If you’re drilling into studs, you can use regular screws. If not, insert wall anchors into the drilled holes to provide additional support for the screws.
5. Secure the Brackets
Position the bracket back on the wall and screw it into place using the provided screws. Ensure the bracket is level and securely fastened to the wall. This is critical for the stability of the shelf.
6. Attach the Shelf
Once the brackets are securely in place, slide the floating shelf onto the brackets. Depending on the design of your shelf, you might need to use additional screws to secure the shelf to the brackets. Make sure the shelf is level and stable.
7. Final Adjustments
Check the shelf for stability and ensure it’s level. If it wobbles or feels unstable, double-check the screws and brackets to ensure they’re tightly fastened. Adjust as necessary to achieve a secure fit.
8. Style Your Shelf
Now that your floating shelf is securely installed, it’s time to style it! Arrange your books, decor items, or storage baskets to suit your needs and aesthetic. Keep in mind the weight limit of your shelf to avoid overloading it.
Tips for Success:
Always wear safety goggles when drilling into walls to protect your eyes from dust and debris.
Use a level at every step to ensure your shelf is straight and even.
If you’re unsure about finding studs or installing wall anchors, don’t hesitate to consult with a professional.
Conclusion:
Installing a floating shelf is an excellent way to add both functionality and style to your home. With just a few tools and some careful planning, you can create additional storage space and enhance the look of any room. Follow these steps to achieve a professional-looking installation that will last for years. Happy DIY-ing!